Recently we have been asked by customers exactly how to best light their garden oil torch.
So today we thought it would be a nice idea to share the basics with you all!
Below are some handy step by step tips for you, we hope you find this helpful.
You can also view our useful, interactive “how to” video here
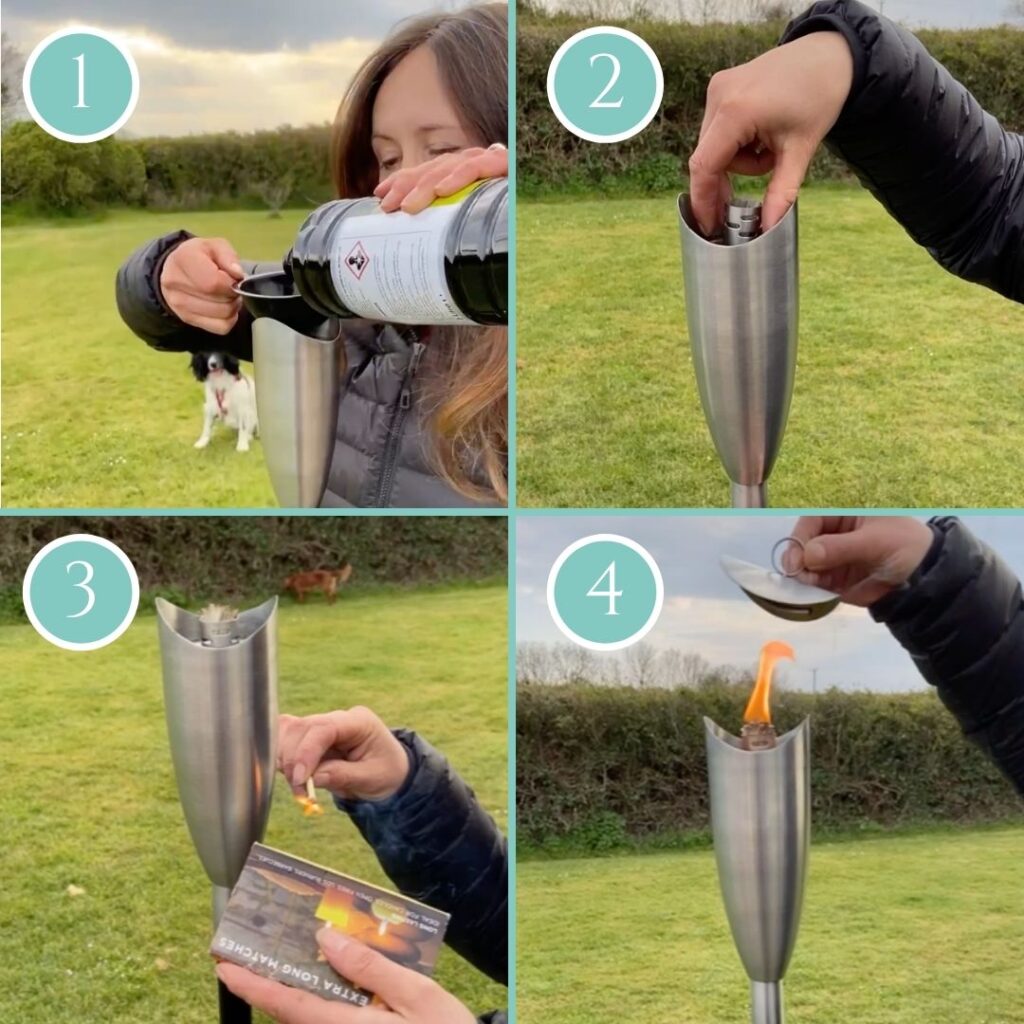
– STEP 1 –
Fill your oil torch using the provided filter, roughly 2/3 capacity with a good quality Paraffin oil. Here we are using Citronella.
On the website we will give you a guide for capacity (and burn time) for each garden oil torch so please check this before filling the oil lamp.
– STEP 2 –
In a clockwise direction screw the provided wick into the lamp.
The wick should be level to its surrounding metal frame or slightly higher if you would like a larger flame.
Leave the wick to soak for about 15 minutes.
– STEP 3 –
To ignite the flame carefully place a long match or lighter to the top of the exposed wick.
You should now have a lovely flame!
– STEP 4 –
To extinguish, simply place the provided snuffer over the flame.
You can wear safety gloves for extra protection.
Leave the garden torch to cool before moving.
Feel inspired? Browse our range of oil torches here, an excellent way to light up your patio or outdoor seating area
Zara x